A scene can now carry as many labels as you like — a point-of-view label and a "needs edit" label and a subplot label, all at once. The binder shows one coloured dot per label, and index cards on the corkboard show them as colour bands across the top.
The first label you add is the document’s main one, and it is the colour the app leads with anywhere only one can show. Deleting a label from the palette simply drops it from every document; the next label steps up.
How to use it
Right-click a document in the binder and choose Set Labels… (or click the coloured strip at the top of an index card on the corkboard).
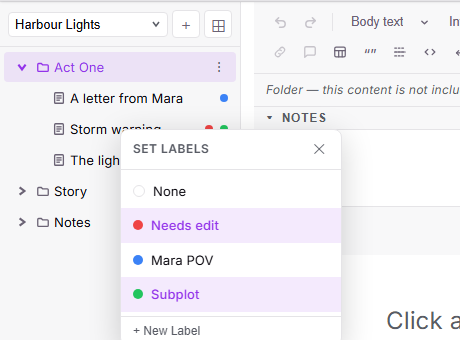
Click each label you want. The panel stays open so you can tick several in one go; click a ticked label to remove it, or None to clear them all. Press Escape or the × when you are done.
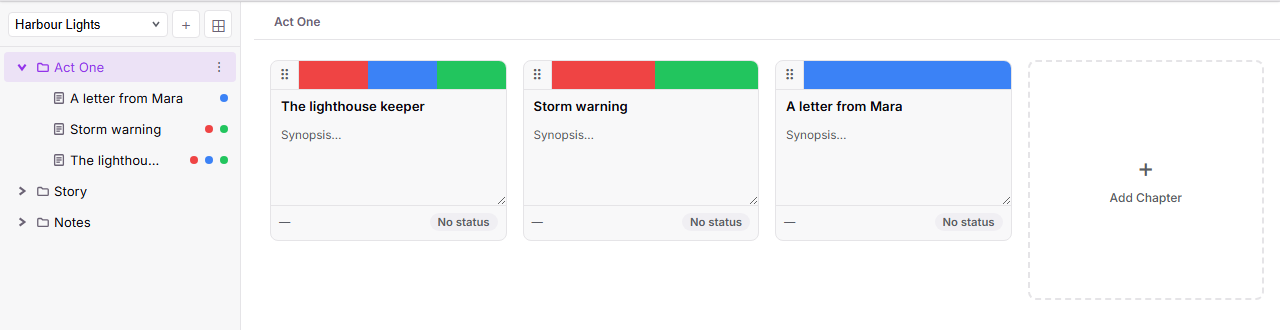
Need a label that does not exist yet? Use + New Label inside the panel, pick a colour, and then tick it.
Your project backups carry every label, so a restored project comes back with all of them.